Finishing
Trowel concrete once the surface bleed water has evaporated and the slab is firm enough to support a person while leaving only a shallow footprint of about 3–5 mm. In practice this is usually a few hours after placing, but the exact window depends on the mix, the temperature and the humidity, so you judge readiness by the slab itself rather than by the clock.
Concrete is ready to trowel once two things are true: the sheen of bleed water on the surface has evaporated, and the slab has stiffened enough to bear weight without deforming. The practical check is the footprint test — step onto the slab and look at the impression you leave. When your boot sinks in only about 3–5 mm and the edges of the print hold their shape, the surface is at the right stiffness to work. Press a thumb into the surface as a second check: it should leave a clear mark but not push through into soft, wet paste. Timing this by eye and feel matters far more than timing it by the clock, because the same mix can be ready in ninety minutes on a hot afternoon or take most of the morning on a cold, damp day.
After concrete is placed and levelled, water rises to the top — this is bleeding, and the thin film it leaves is normal. Trowelling or floating before that water has evaporated is the single most common finishing mistake. Working the surface while bleed water is still present presses that water back down into the top few millimetres of the slab, raising the water-to-cement ratio exactly where you want it lowest. The result is a weak, dusty, easily-scaling surface, and it can also trap water and air under a sealed skin, causing blisters and delamination once the slab below keeps bleeding. So the first rule of timing is simple: wait until the shine is gone and the surface looks matt before any float or trowel touches it.
Trowelling too early traps bleed water and ruins the surface, as above. Trowelling too late is the opposite problem — once the concrete has hardened past the workable stage, the blades can no longer close and densify the surface. You end up chasing a slab that has gone stiff, unable to bring up a tight, burnished finish, and forcing the machine risks tearing or chattering the surface. The readiness window between these two states can be short, especially in warm weather, which is why experienced finishers watch the slab closely as it approaches the matt stage rather than stepping away.
Trowelling is the last step in a sequence, and each stage has to be finished before the next begins:
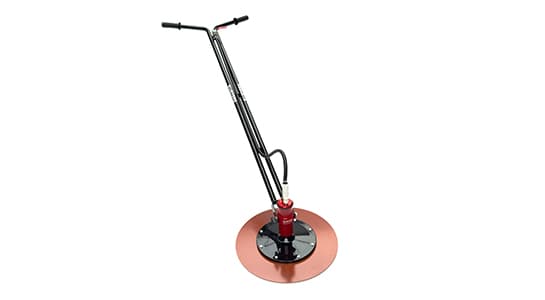
On a machine float the same window applies. The LAP-45 power float, an air-driven trowel Lievers builds in Mijdrecht, the Netherlands, has stepless speed control from zero up to full speed, so the operator can start gently as the slab firms up and increase disc speed as it hardens — matching the machine to the concrete's condition instead of forcing a single fixed pace.
Everything that speeds up or slows down setting moves the trowelling window:
Because of all this, never rely on a fixed number of hours carried over from a previous pour. Judge each slab on the day.
Watch for the surface sheen to dull from wet-shiny to matt; that is your cue to start testing. Confirm with the footprint test (a ~3–5 mm print that holds its shape) and the thumbprint test (a firm mark, not a soft push-through). If water still glistens, wait. If your boot barely dents the surface and the concrete rings hard underfoot, you have likely left it too long and should move quickly. When in doubt, start finishing at the far end from where you began placing, since that concrete was poured first and will be ready first.
Free advice
Our engineers in Mijdrecht think along about machine choice, concrete and planning — answer within one working day.
About the author
Lievers Holland has designed and manufactured concrete compaction and finishing machinery in Mijdrecht, the Netherlands, since 1954. Our guides are written by the same engineering team that builds the machines.
Trowel concrete once the surface bleed water has evaporated and the slab is firm enough to walk on while leaving only a shallow footprint of about 3–5 mm. That is typically a few hours after placing, but the exact time depends on the mix, temperature and humidity, so judge it by the footprint and thumbprint tests rather than the clock.
There is no fixed time — a typical slab is ready to power float a few hours after placing, but it can be as little as one to two hours in hot, dry weather or much longer in cold, damp conditions. Wait until the bleed-water sheen has gone and the surface supports the machine and operator with only a slight footprint, then start floating.
Use two simple tests. First, the surface should look matt, not wet or shiny — the bleed water has evaporated. Second, step onto the slab: if your boot leaves a clean impression of about 3–5 mm that holds its edges, it is ready. A thumb pressed into the surface should leave a firm mark without sinking into soft paste.
Trowelling before the bleed water has evaporated works that water back into the top layer of the slab, raising the water-to-cement ratio at the surface. This produces a weak, dusty, easily-scaling finish and can seal in water and air, leading to blisters and delamination. Always wait for the matt, footprint-ready stage before finishing.
Yes, significantly. Heat, low humidity and wind pull moisture out of the surface faster, so the slab reaches the trowelling window sooner. Cold, damp or still conditions slow setting and push the window back by hours. Never reuse a fixed timing from a previous pour — judge each slab on the day using the readiness tests.
Screed the concrete level, then bull-float to close the surface, then wait for the bleed water to rise and evaporate. Once the slab passes the readiness test, float it with a pan or blades, then trowel to compact and burnish the surface. Each step must be complete before the next begins, and the trowelling window depends on how quickly the slab sets.
 How-to
A step-by-step guide to power floating and trowelling a concrete floor — when to start, floating versus trowelling, overlapping passes and blade pitch, working edges, and choosing a walk-behind or ride-on machine.
Read articleExplainerA plain-language explainer covering what a power float (power trowel, "concrete helicopter") is, the difference between float pans and finishing blades, how the machine works, the finish it produces, walk-behind versus ride-on types, and petrol, electric and pneumatic power options.
Read article